Saturday, December 6, 2014

Group Maker Apps

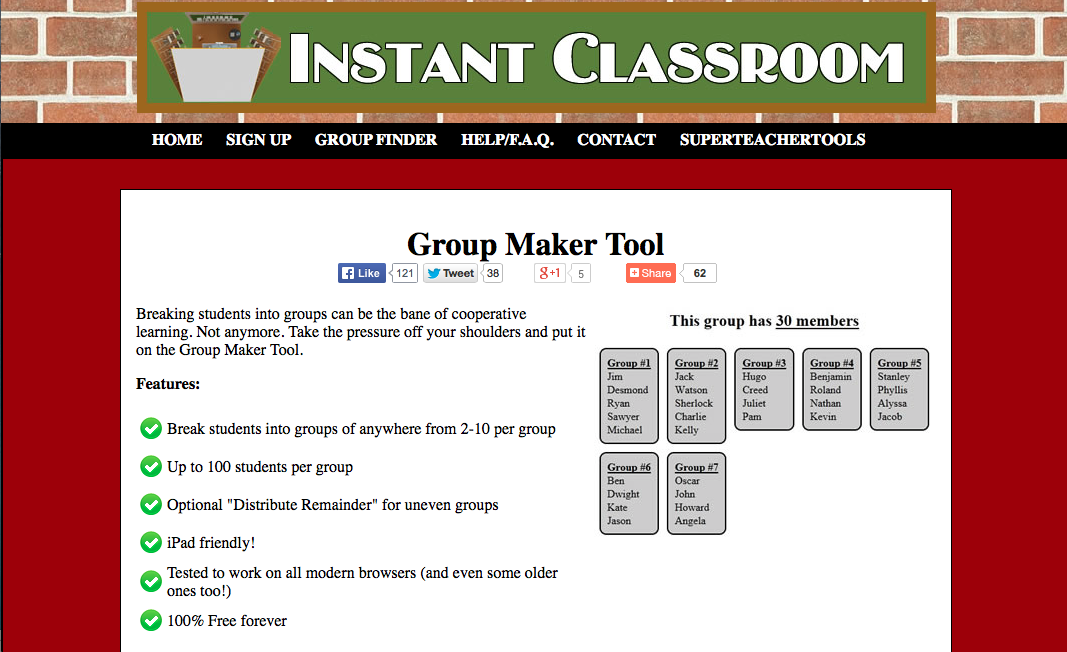
In my classroom, we do a lot of group work. My students don't have desks. They sit at large rectangular tables with chair pockets. This forms a natural group of 4 or 5 students. The usual way I create partners is by saying "your shoulder partner" (next to you)  or "your face partner" (across from you). Now sometimes,  students get tired of having the same partner/group or  TOO comfortable (super talkative or off task). To shake things up, I've used these two Group Maker apps. The first one is a free online website tool called "Instant Classroom" from Super Teacher Tools. All you have to do is sign up with your email.

 Instant Classroom


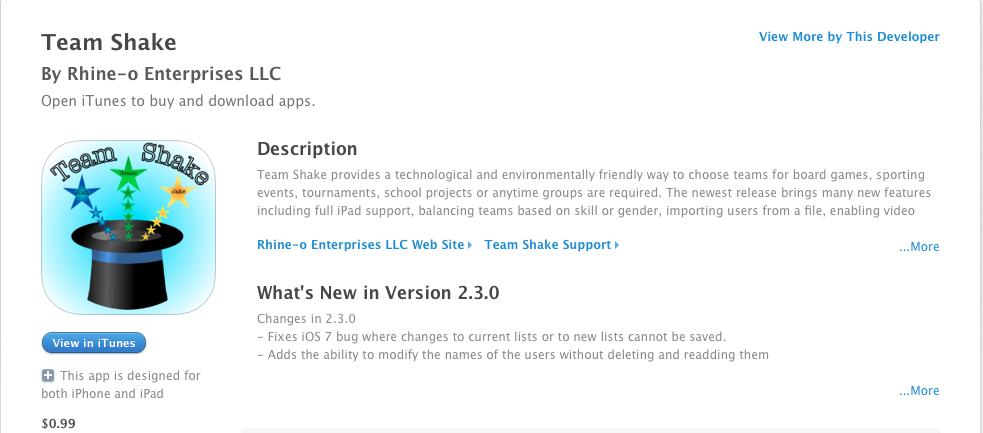
The second app, I use on my iPhone called "Team Shake". I like using this one because I'm able to access it quickly. It's not free, but it's worth the 99 cents! It's easy to use, and I can email myself the groups or take a screen shot.
 Team Shake

 Team Shake


So check out these apps the next time you form your groups. Let me know which one you like best!


Sunday, November 30, 2014

Holiday Christmas Activities


The month of December flies by. We still have standards to cover, but I still want to  create opportunities for fun holiday activities.  I created this pack to teach our standards while having some holiday fun. This pack contains 19 pages for only $2! I included addition and subtraction math tasks and word problems with a Holiday twist.

The first page is a cute Christmas Graphic Organizer for students to complete independently.

The first page is a cute Christmas Graphic Organizer for students to complete independently.

There is a writing Graphic Organizer to help students recount Holiday Memories. The Graphic Organizer can be turned into Narrative Writing Paragraph/Piece. 


There are many Math Tasks/ Word Problems.

The last Math Task is connected to making a Handprint Wreath. Students solve the math tasks and create their own Handprint Wreath. Directions and tasks are included.


Friday, October 10, 2014

Ps and Qs

Ps and Qs. Bs and Ds. My struggling readers can't seem to get them right. I've tried every trick I can find on Pinterest, but nothing seems to work. I tried the thumb trick, the bed trick, sticky note reminders on desks, and the baseball & bat visual.  I asked some Special Education teacher friends for some advice, and they both told me that the reversals can be fixed with letter formation practice. So I watched my students write bs, ds, ps, and qs. I watched where they started the formation, and guess what? Their formations were totally incorrect.


I thought of a different way to teach these reversals. Since the letter q is usually associated with the word queen, I tell my students that q stands for queen. I say, "Q is a queen. She likes to put on her make up and lipstick first. So we must write her face first, then make the line for her hair." P stands for prince. I say, "The prince likes to have his body done first, then his face". 

I added a star to each letter to show where you should start when writing the letter. Here's the correct formation for Ps and Qs:


So far, these visuals seem to be helping my students improve their reversals. The key is to keep practicing writing and recognizing them until they stick for good. It's taken my students 2 years (K and 1st grades) to make these mistakes. It's going to take a while to undo these mistakes. Patience and repetition are the keys.

I also have a trick for B and D that I'll post soon.
Have you found any strategies that work for your students? Please share!

Saturday, September 6, 2014

S'more Paragraph Writing


I LOVE teaching writing to my second graders. It's a process, but by the end of the school year, their growth amazes me! This year I'm teaching my students that a paragraph is like a S'more. The top cracker is the topic sentence, the marshmallow and two layers of chocolate are the supporting details, and the bottom cracker is the closing sentence. I've used many graphic organizers, such as the hamburger. However, I wanted to try something new. For some reason, my students don't get excited over a hamburger paragraph. But a S'more paragraph sounds so much more delicious! To motivate them, I plan to make S'mores with my kids and make the comparisons to a paragraph. I'm hoping this analogy will stick! The poster is a Freebie in my Teachers Pay Teachers Store. I also created a set which includes the poster, rubrics, and graphic organizer.
Click here to download the poster, graphic organizer, and rubrics.
Click here for the Freebie poster


Tuesday, August 12, 2014

A Word About Word Walls

Every year I set up a Word Wall with the best intentions. However, I have always struggled with making it actually usable. I think I finally have it down! So here's what I'm doing to "Make it Work!" (as Tim Gunn says).

  • I use a chalk board or dry erase board so I can easily add & remove words
  • I use colored chalk or markers to color code my words- one color is for high frequency words, another is for enrichment vocabulary words. I bought Bistro board style chalk markers from Hobby Lobby (see pic below). They are perfect!
  • When the wall is full, I'll take a picture of it, print it, and have it available in the room for kids to refer back to during writing.
  • Pictures- I'm going to try adding pictures next to the enrichment vocab words as visual cues.
  • Get your enrichment vocabulary words from read alouds. Thank you Junie B. for the word suspicious!
  • Use SOME of the vocabulary words from your basal story. Be selective!
  • Sparkle Words- Reward students who actually use the enrichment vocabulary words in their writing. A skittle goes as long way!
  • Feature words by putting a magnet, pom-pom, etc. next to a word. If a student uses it, they get props (or a skittle)!
Yellow is for high frequency words and pink is for enrichment vocabulary words.


Hobby Lobby Bistro Chalk Markers
They are bright and beautiful!


Sparkle word & reward students who use it in their writing


Side Note: There's a "I'm Invisible" light button on my board. I turn it on when I'm testing or in small group. For some reason, 7 year olds don't understand "Do not interrupt me." But they understand a light! Thanks to my grade level team mate for sharing this idea!


Bye-Bye Name Tags

One of my pet peeves is when name tags start to curl, peel, and  look like they just came out of the trash can. This all usually happens by October.
Introducing: "Sharpie Paint Pens"!


I got this pack at Hobby Lobby with a 40% off coupon. Don't forget the coupon! Then they only cost $12. Did you know that if you don't have a coupon, you can just bring it up on your smart phone at the register? 

I first saw this fab idea at the blog "Timeouts and Tootsie Rolls". My friend, Madalyn, and I decided to try this out this year. Then Madalyn had the great idea of color coding names so that we could create groups by color. So now we can say, "Purple People" pick up your group's papers.", or "Orange people will work together."


All you need is a Magic Eraser or nail polish remover to wipe off the names when you're ready to switch around seats. I've discovered that nail polish remover works best!


BYE-BYE name tags!

Get Organized with a Teacher Binder

How do you keep all those important papers organized throughout the year? When you go to a meeting, do you have to scour your desk and files for just the right paper work? I hate losing things and not being prepared. So after browsing Pinterest, I found the Teacher Binder idea. A Teacher Binder  is a binder (with divided sections) to keep your most used & important papers. This past school year was the first time I used a Teacher Binder, and let me tell you, I will never do without one! Here's a photo of my heavily used, but sturdy, binder:


Click here to download this freebie


With the new school year quickly approaching, I got the itch to create some new Teacher Binder designs. You can download these for free at my TPT store. There are three different designs- Multi Chevron,  Chevron, and Apple Dots. I've included 12 different divider pages- Teacher Binder, Student information, Student Data, Common Core Standards, Lesson Ideas, Groups, Classroom Management, Meeting Notes, Resources, Parent Communication, Calendars, and a blank page. After you print the dividers, put them in page protectors, and you're all set! I added small tabs to label the sections on the sides. When you walk into your first team meeting with your new Teacher Binder, everyone will be impressed with your organization! I promise. :)


Click here to download this Teacher Binder freebie